작업 환경: Windows 11, Visual Studio Code, Visual Studio 2022, Unreal engine5.4.4, Git
설치
Unreal engine 5 설치
언리얼 엔진 공식 사이트(https://www.unrealengine.com/ko/download)에 접근하여 자신의 OS 환경에 맞게 다운로드를 실행.
Visual Studio 2022 설치
Visual Studio 2022 공식 사이트(https://visualstudio.microsoft.com/ko/vs/)에 접근하여 Community 2022 버전을 설치.
이후 Visual Studio Installer에서 설치가 진행되는 중 아래의 선택 사항을 모두 체크.
- .NET 데스크톱 개발
- C++을 사용한 데스크톱 개발
- Windows 애플리케이션 개발
- C++을 사요한 게임 개발(Windows xx SDK, Unreal Engine 관련)

Visual Studio Code 설치
Visual Studio Code 공식 사이트(https://code.visualstudio.com/)에 접근하여 설치.
Git 설치
Git 공식 사이트(https://git-scm.com/)에 접근하여 설치.
이후 설정 참고: https://cheongyastory.tistory.com/52
언리얼 엔진5 프로젝트 생성
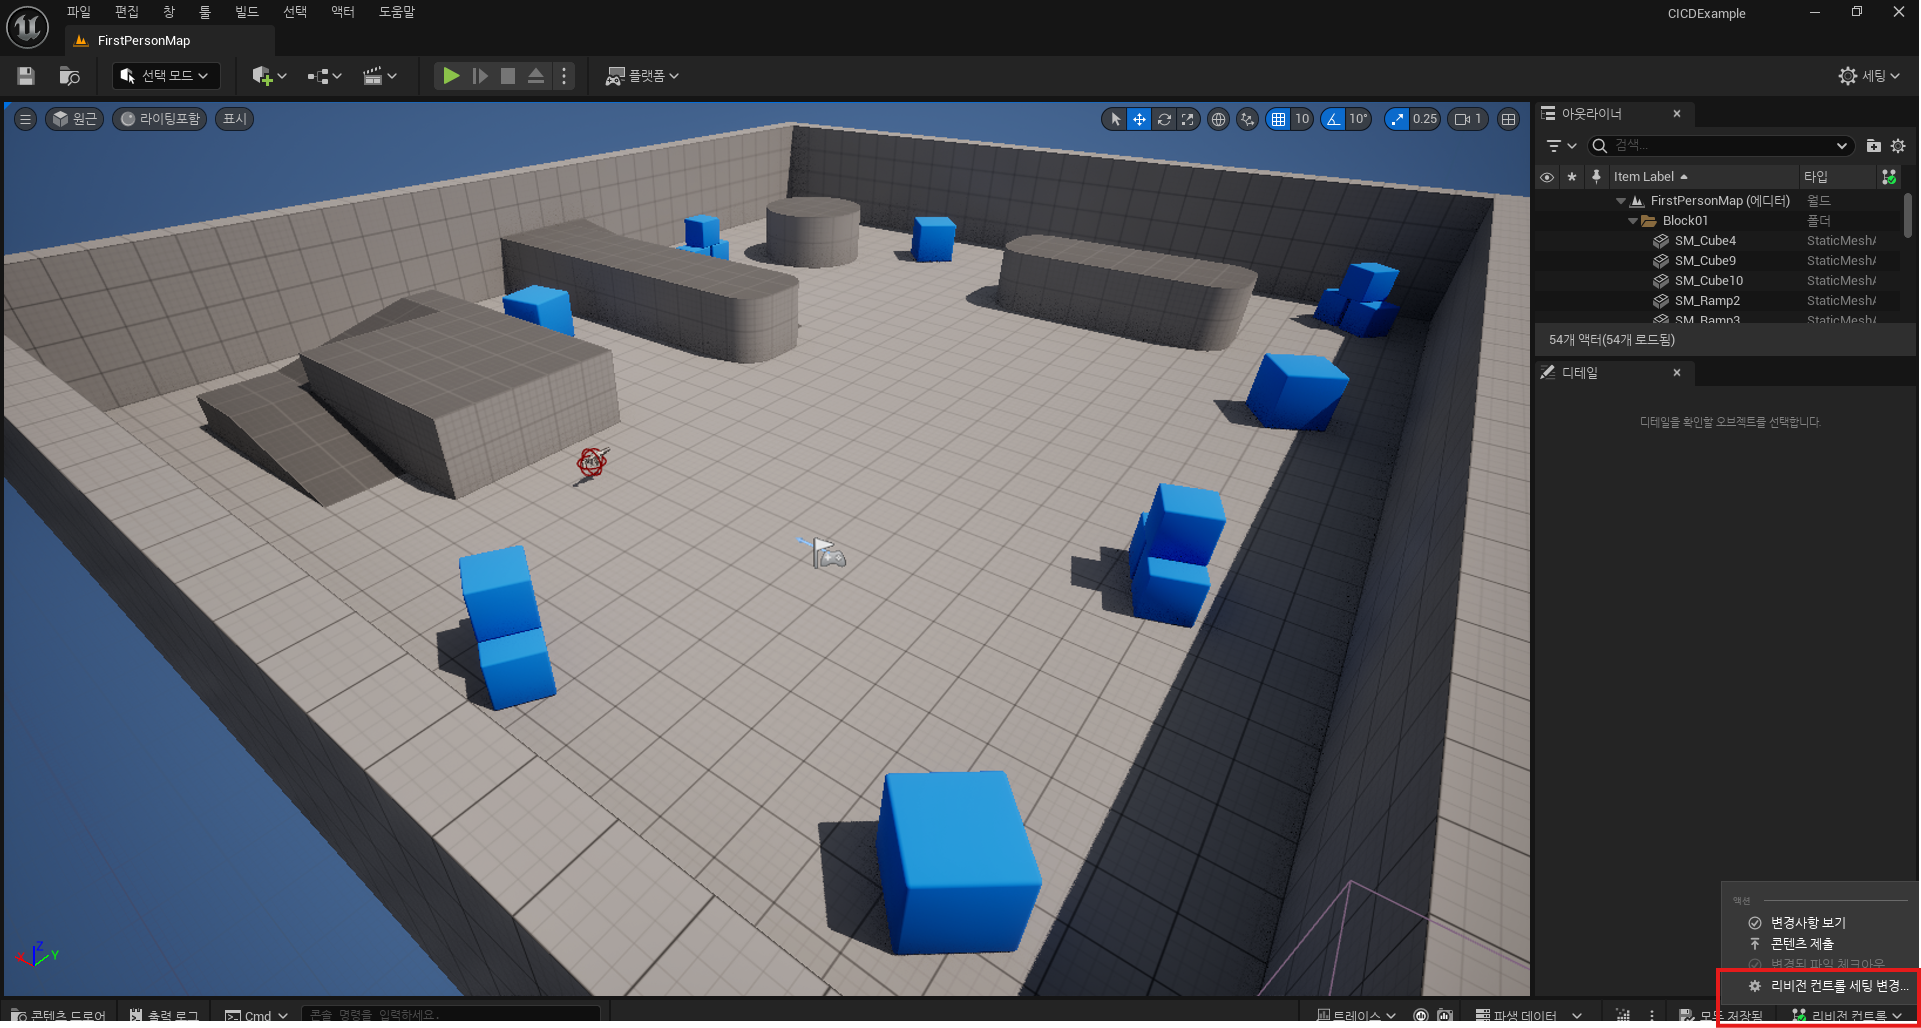
언리얼 엔진5에 접속하여 게임 프로젝트를 하나 생성한다.
쉽게 편집할 수 있는 일인칭 템플릿을 사용하였고, 퀄리티 프리셋을 Scalable로 설정하여 빌드를 빠르게 끝낼 수 있게 하였다.
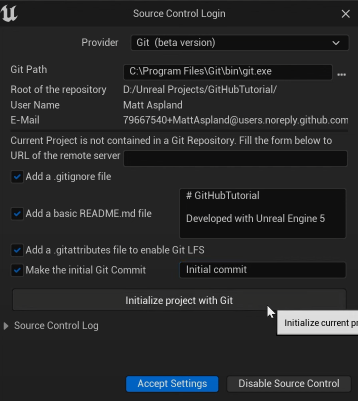
생성이 완료 된 프로젝트의 우측 하단에 보면 리비전 컨트롤이 있다. 누른 후 리비전 컨트롤 세팅 변경을 눌러 Github와 연동을 해줍니다.
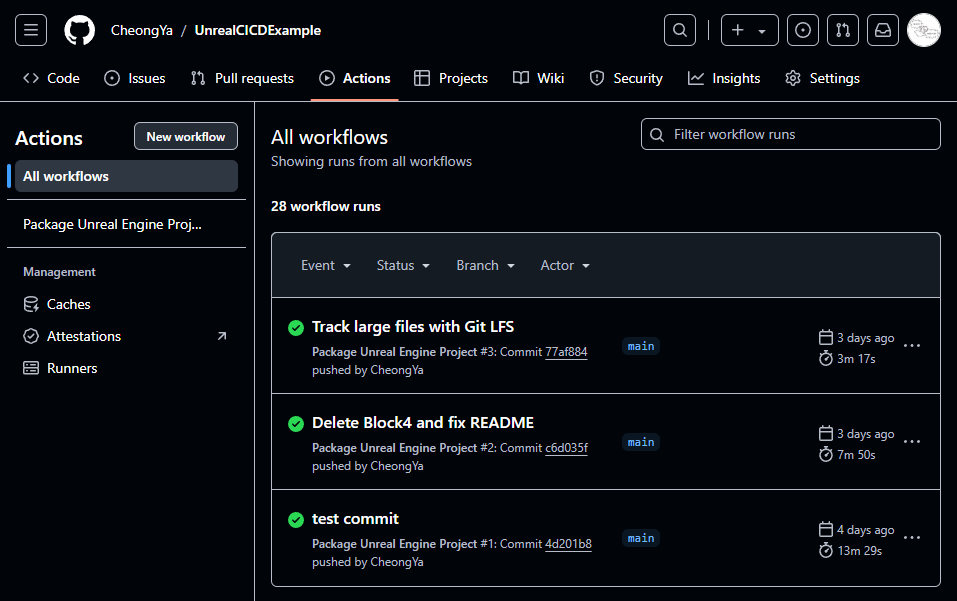
Github Workflows 생성 및 Github Actions 구성
Github Workflow와 Github Action을 사용하여 CI/CD를 구축할 것이다.
Github Workflow 예제: https://docs.github.com/en/actions/use-cases-and-examples/creating-an-example-workflow
아래는 내가 진행한 코드이다.
name: Package Unreal Engine Project

on:
  push:
    branches:
      - main
    paths-ignore:
      - 'Windows/**' # windows 폴더 내 모든 파일 제외
      - 'Build/**'
  pull_request:
    branches:
      - main

jobs:
  build:
    runs-on: self-hosted
    name: Package Unreal Engine Game
    steps:
      # 1. 코드 체크아웃
      - name: Checkout code
        uses: actions/checkout@v3

      # 2. Unreal Engine 프로젝트 패키징
      - name: Package Project
        env:
          UE_PATH: 'D:\Epic Games\UE_5.4' # Path to your Unreal Engine installation
          PROJECT_PATH: 'D:\External Project\Building Unreal CICD Engine (2024.11.18)\test\CICDExample\CICDExample.uproject' # Path to your Unreal project file
          OUTPUT_PATH: 'D:\External Project\Building Unreal CICD Engine (2024.11.18)\test\CICDExample' # Path to where you want to store the packaged game
        run: |
          # Try to run empty UAT to check for correct path
          & $env:UE_PATH\Engine\Build\BatchFiles\RunUAT.bat BuildCookRun -project="$env:PROJECT_PATH" -noP4 -platform=Win64 -clientconfig=Development -serverconfig=Development -cook -allmaps -build -stage -pak -archive -archivedirectory="$env:OUTPUT_PATH"

      # 3. Windows 폴더 압축
      - name: Compress Windows Folder
        run: |
          cd "D:\External Project\Building Unreal CICD Engine (2024.11.18)\test\CICDExample"
          if (Test-Path "Windows.zip") { Remove-Item "Windows.zip" } # 기존 zip 파일 삭제
          Compress-Archive -Path Windows -DestinationPath Windows.zip # Windows 폴더 압축
Github Actions workflow 구문: https://docs.github.com/en/actions/writing-workflows/workflow-syntax-for-github-actions#onpushpull_requestpull_request_targetpathspaths-ignore
Github self-hosted runner 적용
Github의 Actions -> Runners -> Self hosted runners에 접근한다. 본래는 아무것도 없지만 블로그를 작성하기 전에 작업을 했기에 생성했던 runner가 남아있다.
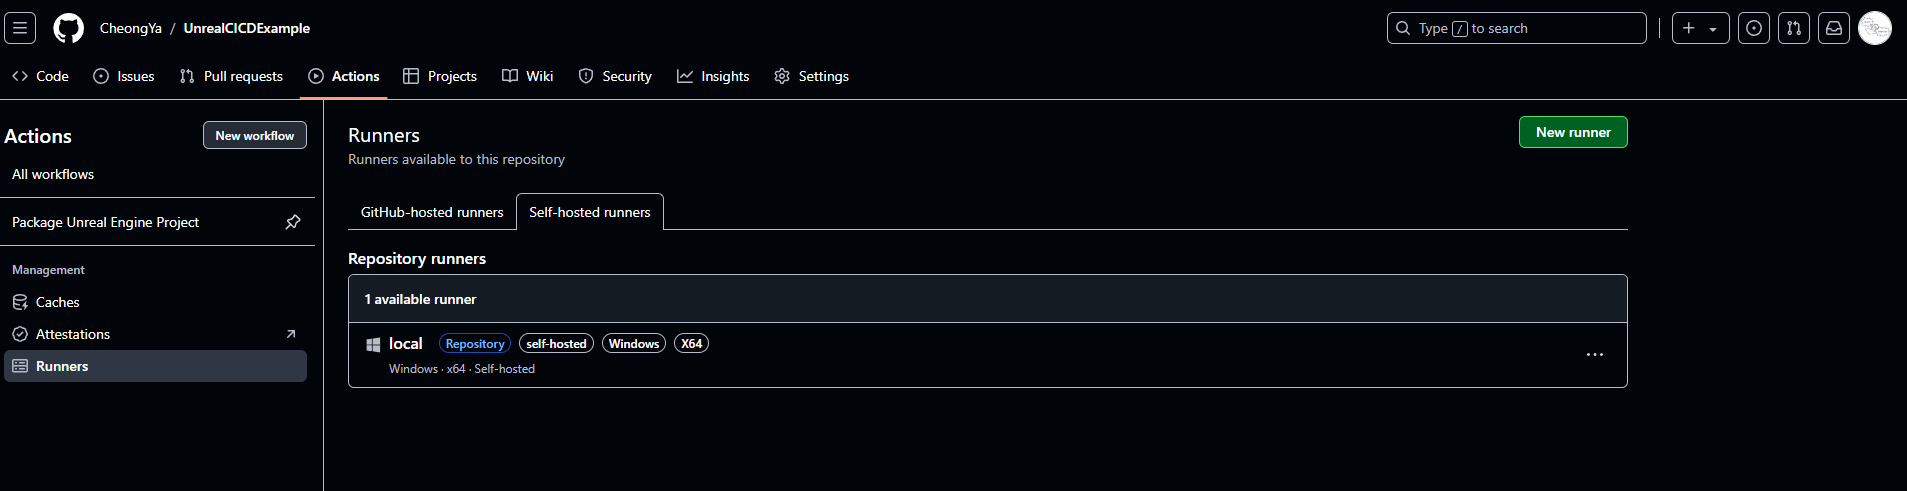
우측 상단의 New runner를 누르면 settings의 runners로 자동으로 넘어가진다.

이후 New self-hosted runner를 클릭하면 각 OS에 따른 설치 방법이 나오게 된다.
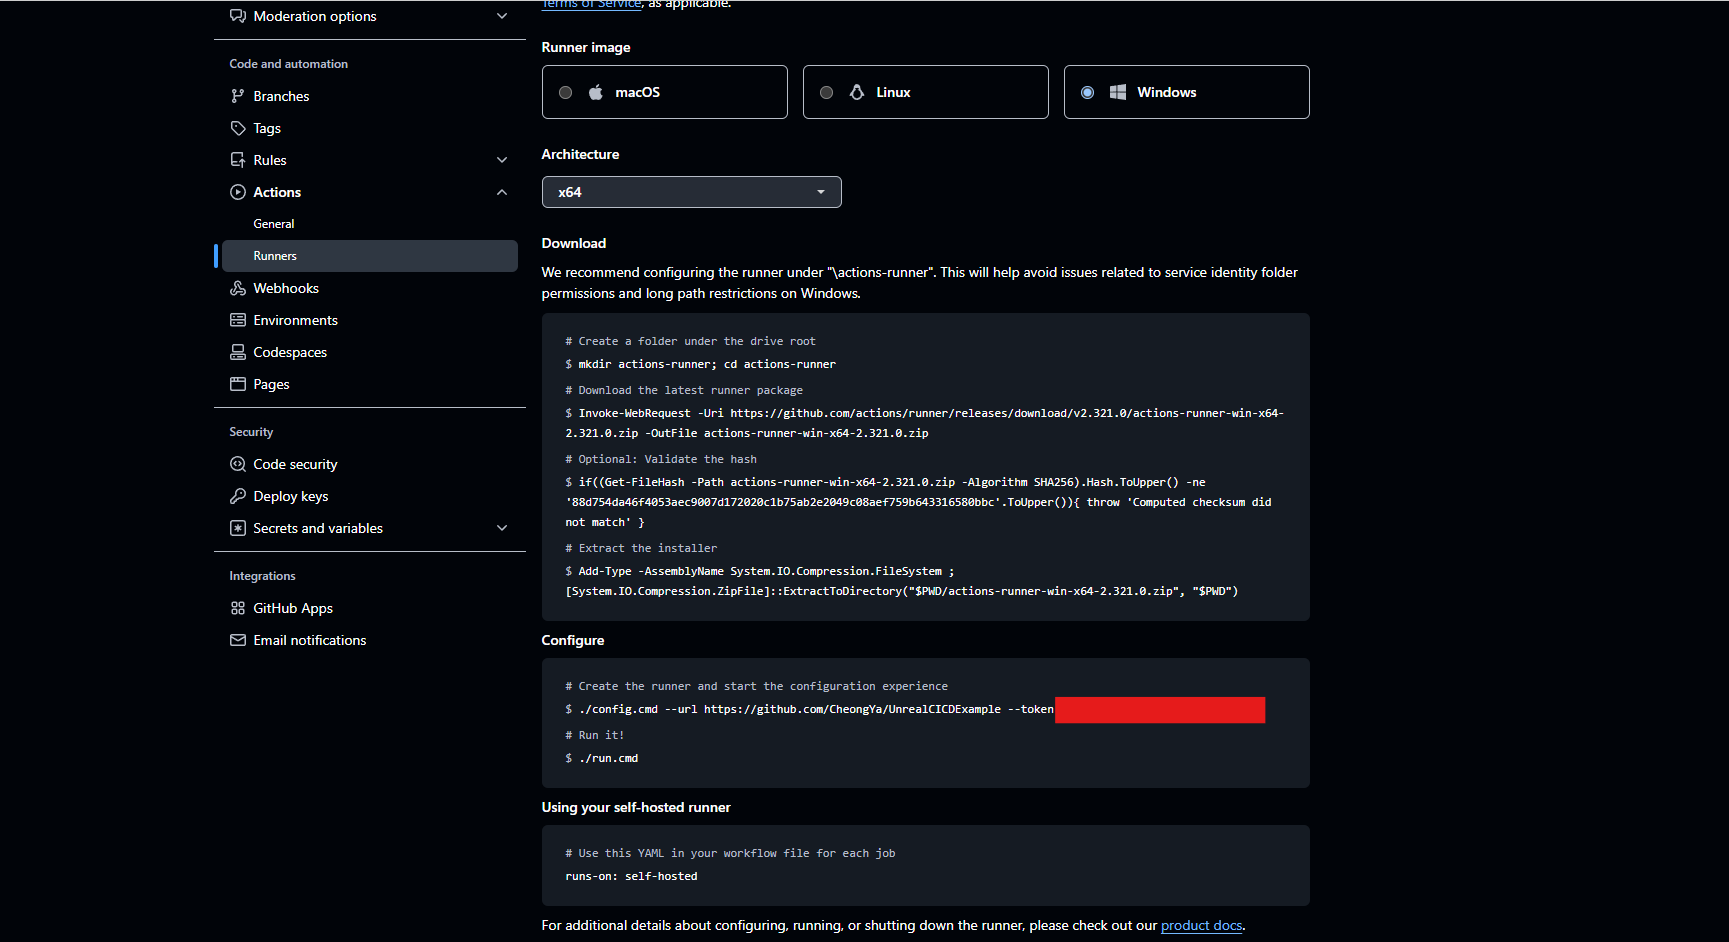
필자는 window x64를 사용하고 있기에 해당 OS를 기준으로 설명을 한다.
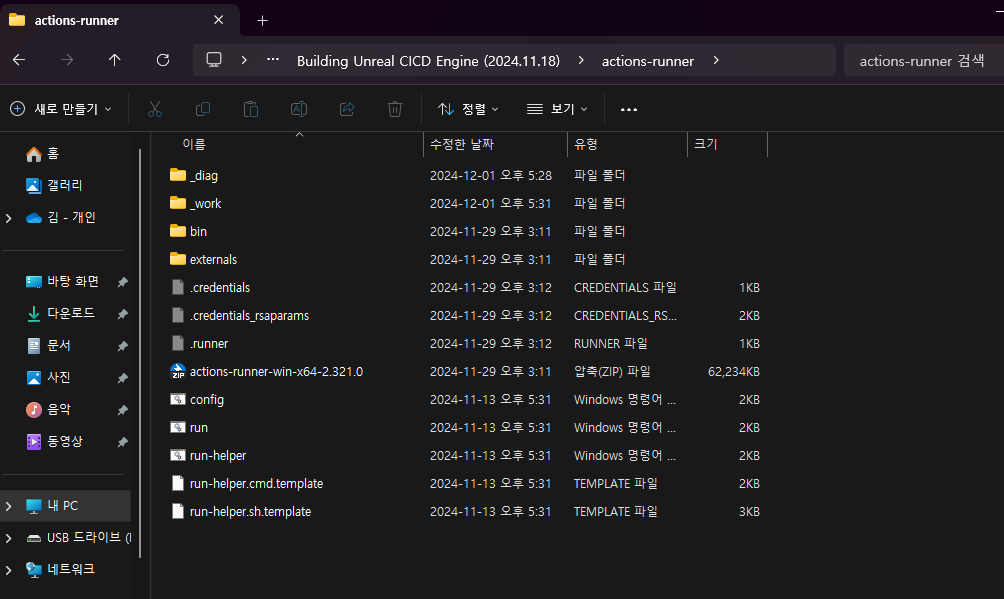
Window의 PowerShell를 실행한 후 actions-runner를 설치를 할 폴더로 들어간다. 이후 사진에 보이는 명령어들을 실행시키면 된다.
설치가 완료된다면 다음과 같이 폴더와 몇 가지의 파일들이 생성된 것을 확인할 수 있다.
여기서 powershell이나 cmd를 이용하여 폴더로 접속한 후 ./run.cmd 명령어를 사용하여 실행해도 되고, 혹은 run 파일을 직접적으로 실행시켜도 무관하다.
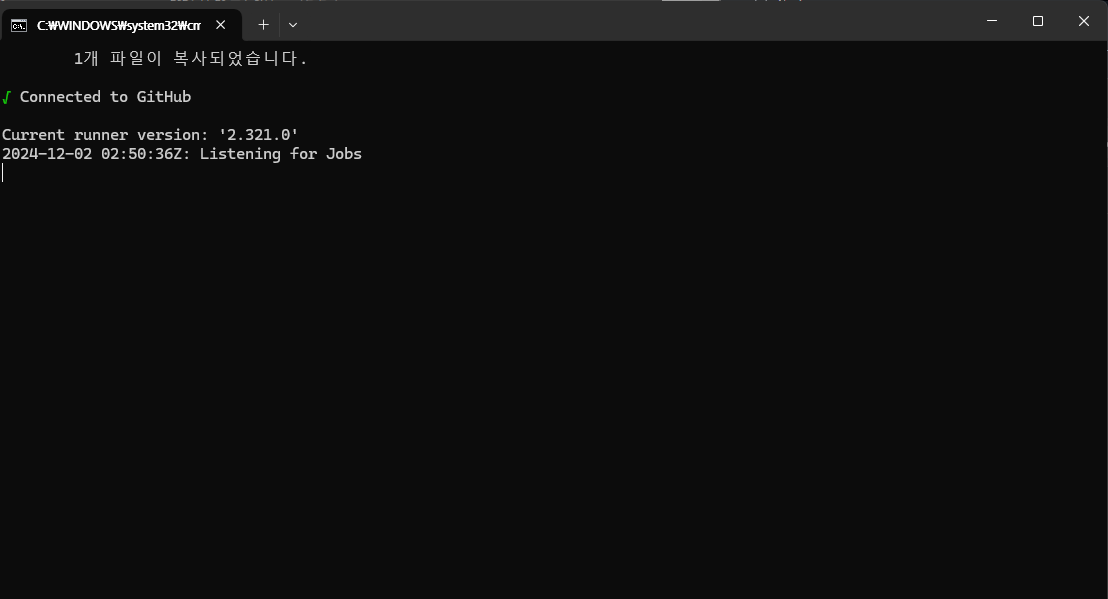
해당 파일을 실행시키면 Actions에 대기 상태의 작업물이 있다면 self-hosted 방식으로 실행이 된다.